Controlling Ten Thousand RGB LEDs

RGB LEDs are awesome – especially the new, fancy ones with the WS2812 RGB LED driver. These LEDs can be individually controlled to display red, green, and blue, but interfacing them with a microcontroller or computer presents a problem: microcontrollers generally don’t have a whole lot of RAM to store an image, and devices with enough memory to do something really cool with these LEDs don’t have a real-time operating system or the ability to do the very precise timing these LEDs require.  [Sprite_tm] thought about this problem and came up with a great solution for controlling a whole lot of these WS2812 LEDs.
Controlling Ten Thousand RGB LEDs
[Sprite] figured there was one device on the current lot of ARM/Linux boards that provides the extremely precise timing required to drive a large array of WS2812 LEDs: the video interface. Even though the video interface on these boards is digital, it’s possible to turn the 16-bit LCD interface on an oLinuXino Nano into something that simply spits out digital values very fast with a consistent timing. Just what a huge array of RGB pixels needs. Using a Linux board to drive RGB pixels using the video output meant [Sprite_tm] needed video output. He’s running the latest Linux kernel, so he didn’t have the drivers to enable the video hardware.

Not a problem for [Sprite], as he can just add a few files to define the 16-bit LCD interface and add the proper display mode. [Sprite_tm] already taken an oscilloscope to his board while simulating 16 strips of 600 LEDs, and was able to get a frame rate of 30 fps. That’s nearly 10,000 LEDs controlled by a single €22/$30USD board. Now the only obstacle for building a huge LED display is actually buying the RGB LED strips. A little back-of-the-envelope math tells us a 640×480 display would be about $50,000 in LEDs alone. Anyone know where we can get these LED strips cheap?

read the rest of article...

A Low Cost Dual Discriminator Module for the Easy-phi Project

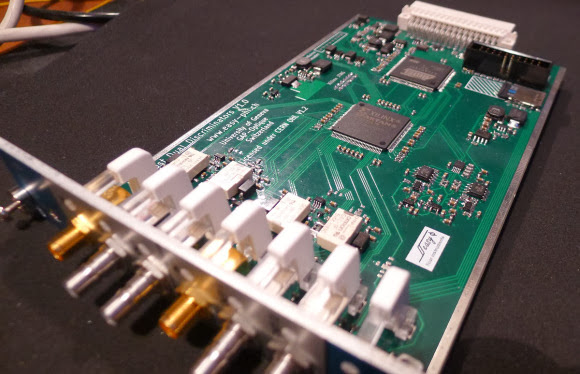
A few months ago I presented you the Easy-phi project, which aims at building a simple, cheap but intelligent rack-based open hardware/software platform for hobbyists. With easy-phi, you simply have a rack to which you add cards (like the one shown above) that perform the functions you want.
A Low Cost Dual Discriminator Module for the Easy-phi Project
Recently my team finished testing our FPGA-based discriminator or “universal input” if you prefer. As easy-phi cards use a well-defined electrical signal to communicate with each other, we needed to make a card that would translate the different kinds of electrical signals from the outside, as well as perform plenty of other functions. It was therefore designed to have a 100MHz input bandwidth with an AC/DC coupled 50 ohm/high impedance input stage (x2) and 4 easy-phi outputs.

For this module, we picked the (old) spartan3-an FPGA to perform the different logic functions that may be needed by the final users (high speed counter, OR/XOR/AND, pulse creation,…). Using the cortex-m3 microcontroller present on the board, it may be easily reconfigured at will. All design resources may be found on our Github, and you can always have a look at our official website.
read the rest of article...

Building An Engine Control Unit With The STM32F4


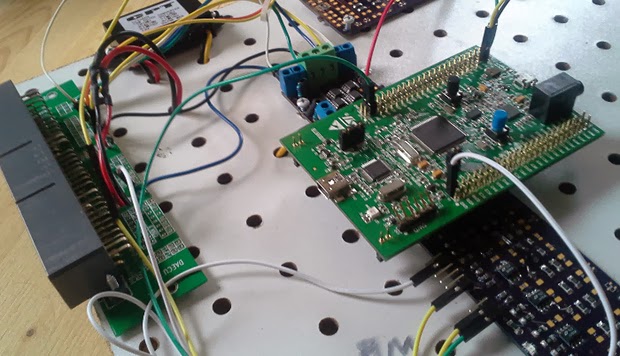
If you’re looking to soup up your whip, the first place you’ll probably look is the engine control unit. This computer shoved in the engine compartment controls just about every aspect of your car’s performance, from the air/fuel ratio, the ignition timing, and the valve controls. Upgrading the ECU usually means flashing new firmware on the device, but [Andrey] is taking it one step further: he’s building his own ECU using the STM32F4 Discovery dev board.
Building An Engine Control Unit With The STM32F4
[Andrey]‘s ride is a 1996 Ford Aspire, but while he was developing his open source ECU, he wanted to be able to drive his car. No problem, as going down to the junkyard, picking up a spare, and reverse engineering that was a cheap and easy way to do some development. After powering this spare ECU with an ATX supply, [Andrey] was able to figure out a circuit to get sensor input to his microcontroller and having his dev board control the fuel injector.

With a few additional bits of hardware [Andrey] has his open ECU controlling the fuel injection, ignition, fuel pump, and idle air valve solenoid. Not a bad replacement for something that took Ford engineers thousands of man hours to create. [Andrey]‘s ECU actually works, too. In the video below, you can see him driving around a snow-covered waste with his DIY ECU controlling all aspects of the engine. If the engine sounds a little rough, it’s because a wire came loose and he was only using two cylinders. A bit of hot glue will fix that, though.

read the rest of article...

Making An ARM Powered MIDI Synthesizer

What you see in the picture above is a hand-made 4-oscillator synthesizer with MIDI input, multi-mode filter and a handful of modulation options. It was built by [Matt], an AVR accustomed electronics enthusiast who made an exception to his habits for this project. The core of the platform is a DIP packaged 32-bit Cortex-M0 ARM processor (LPC1114), stuffed with ‘hand’ written assembly code and compiled C functions. With a 50MHz clock speed, the microcontroller can output samples at 250kHz on the 12bit DAC while being powered by 3 AA batteries.
Making An ARM Powered MIDI Synthesizer
Reading [Matt]‘s write-up, we discover that the firmware he created uses 4 oscillators (sawtooth or pulse shape) together with a low frequency oscillator (triangle, ramp, square, random shapes). It also includes a 2-pole state-variable filter and the ability to adjust the attack-release envelopes (among others). The system takes MIDI commands from a connected device. We embedded videos of his creation in action after the break.


read the rest of article...

Making The Worst Linux PC Useful

After seeing [Dimitry] build the most minimal Linux computer ever, [Kyle] decided he needed one for himself. In true hacker fashion, he decided to take this build for the worst Linux PC one step further: he would add I2C to his version, making it somewhat useful, considering the number of I2C peripherals out there.
Making The Worst Linux PC Useful
This build is based on [Dmitry]‘s ARM Linux computer emulated on an 8-bit AVR. It’s a full-blown Linux computer with 16 MB of RAM courtesy of a 30-pin SIMM, a lot of storage provided by an SD card, all running on an emulated ARM processor inside a lowly ATMega1284p. [Kyle] built this clone over the course of a few months, but from the outset decided he wanted to implement an I2C protocol on this terribly under specced computer.

After booting his computer, [Kyle] eventually got an I2C module loaded by the kernel. With an I2C module and a few spare GPIO pins, he set out to create something to attach to this terribly slow computer – an ancient LED dot matrix display. With a real-time clock, this display became a clock  with the help of a homebrew program written in C. Considering the speed of the emulated processor, the program takes nearly three seconds to read the RTC and display the current time to the display. We’re thinking it was a wise choice to only implement hours and minutes in this clock.

If having a useful computer running at about 10 kilohertz isn’t enough, [Kyle] also compiled the classic text-based adventure Zork. It actually runs, proving you don’t need Megahertz of power to do something useful and fun.
read the rest of article...

Breadboard Friendly ARM Board Based on STM32F4

Umm yeah… this is more like it. The STM32F4Stamp is a project which [Frank Zhao] put together to make his ARM prototyping process more like is was back when everything came in a DIP format. As you can see, it’s just narrow enough to leave one row open on the breadboard for jumper wires.
Breadboard Friendly ARM Board Based on STM32F4
Don’t get us wrong, we do really like STM’s own Discovery Boards for the hardware they deliver at a very low price. But the dual-row pin headers on the larger versions (all except the F0 variant) make it tricky to connect your peripherals. This is pushed to the point that a large percentage of hacks we’ve seen with the Discovery boards are actually just to make connecting external hardware easier.
Breadboard Friendly ARM Board Based on STM32F4
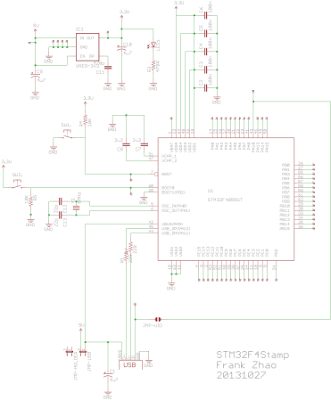
You may be thinking that there’s a lot missing from this board, but we disagree. Obviously there’s still a USB port which can be used to power the board via a 3.3V regulator. But since the STM32 chips have a built-in bootloader the USB connection can also be used to flash firmware to the processor. Nice! It’s open hardware if you want roll your own. For your convenience we’ve embedded the schematic after the break, along with [Frank's] demo video.


http://www.youtube.com/watch?v=dJDpkEFYyiw

[via Dangerous Prototypes]
read the rest of article...

Speeding Up BeagleBone Black GPIO A Thousand Times

For both the Raspberry Pi and BeagleBone Black, there’s a lot of GPIO access that happens the way normal Unix systems do – by moving files around. Yes, for most applications you really don’t need incredibly fast GPIO, but for the one time in a thousand you do, poking around /sysfs just won’t do.
Speeding Up BeagleBone Black GPIO A Thousand Times
[Chirag] was playing around with a BeagleBone and a quadrature encoder and found the usual methods of poking and prodding pins just wasn’t working. By connecting his scope to a pin that was toggled on and off with /sysfs he found – to his horror – the maximum speed of the BBB’s GPIO was around three and a half kilohertz. Something had to be done.

After finding an old Stack Overflow question, [Chirag] hit upon the solution of using /dev/mem to toggle his pins. A quick check with the scope revealed he was now toggling pins at 2.8 Megahertz, or just about a thousand times faster than before.
read the rest of article...

Meet the Teensy 3.1

[Paul Stoffregen] just released an updated version of his Teensy 3.0, meet the oddly named Teensy 3.1. For our readers that don’t recall, the Teensy 3.0 is a 32 bit ARM Cortex-M4 based development platform supported by the Arduino IDE (using the Teensyduino add-on). The newest version has the same size, shape & pinout, is compatible with code written for the Teensy 3.0 and provides several new features as well.
Meet the Teensy 3.1
The Flash has doubled, the RAM has quadrupled (from 16K to 64K) allowing much more advanced applications. The Cortex-M4 core frequency is 72MHz (48MHz on the Teensy 3.0) and the digital inputs are 5V volts compatible. Pins 3 and 4 gained CAN bus functions. The new microcontroller used even has a 12 bits Digital to Analog Converter (DAC) so you could create a simple signal generator like the one shown in the picture above. Programming is done through the USB port, which can later behave as host or slave once your application is launched. Finally, the price tag ($19.80) is in our opinion very reasonable.
Embedded below is an interview with its creator [Paul Stroffregen].

[Mathieu] Hi Paul, I’d like to first thank you for giving us some of your time for this interview. Could you tell us what are your motivations behind the Teensy project?

[Paul] I’ve been publishing electronic hobbyist resources since 1991, starting with the 8051 chip. Teensy 3.0 & 3.1 are my attempt to bring powerful ARM microcontrollers to hobbyists. They run code faster, but optimized native libraries are what really facilitates projects. Earlier this year I wrote OctoWS2811, for controlling thousands of RGB LEDs at video speeds. Many awesome builds have used it, like the Disorient Pyramid. Recently I’ve been working on an advanced audio library. Developing these platforms that enable so many people use to build such awesome projects really is my passion.

To be honest, a secondary motivation is business related. PJRC’s main focus is developing technology for hobbyists, which is distinctly different, and not nearly as profitable, as selling as many products as possible at good margins. This market is quite competitive, with many microcontroller boards and even new software initiatives appearing regularly. PJRC can’t rest on its laurels. Teensy 3.1 is meant to really step up the technical capability a hobbyist can buy for under $20 and utilize easily with excellent Arduino compatibility. I’m also pretty motivated to build projects myself, or contribute to big projects, especially for Burning Man.

[Mathieu] What kind of projects are done with Teensy?

[Paul] Scrolling through the Teensy Projects page can give you great visual idea of what people have made. My personal favorite is the motion sensor that wakes your computer up before you sit down in your chair. Why didn’t I think of that?! MIDI controllers, specialized USB peripherals, and LED projects have been popular themes.

[Mathieu] What do you think of Arduino now that Teensy is compatible with it?

[Paul] Arduino is awesome. We have the same goals. They focus more on absolute beginners and I cater moreso to ambitious creative types, but we’re both about building a platform to enable people to make projects. I’ve contributed regularly to Arduino over the last 4 years while developing Teensy. I’m happy to say my relations with Arduino have greatly improved in the last year or so. I believe we’re going to collaborate more in the coming years. Here’s some of my past contributions to Arduino.\

Regarding Arduino compatibility itself, doing it well on anything other than 8-bit AVR is far more challenging than most people realize. Implementing a few dozen functions like digitalWrite() is only the beginning. For example, this afternoon I built special test hardware I’m sending to a developer of the host shield library (that library is already compatible… this is new speed-optimized development). This morning I worked on a null pointer bug in a wifi library, and yesterday I submitted a patch for a specialized graphical LCD library. Features no Arduino boards have, like Teensy’s Tools > USB Type menu for non-Serial options, really compound the required effort. I personally love doing this technical work, but the point is [that] excellent Arduino compatibility isn’t a destination, but a continuing journey.

I know some regular Hack-a-Day readers don’t love Arduino. As a long-time vi user, I activate Arduino’s “external editor” feature. But it’s undeniable how well Arduino has enabled novices to build projects. However, I am planning to start publishing a non-Arduino package next year, which includes all this effort for libraries and features that “just work”. Today you have to install Arduino and then find a makefile the Teensyduino installer buries within the core library, without much in the way of documentation or help. Many people have indeed done exactly that, but I could do much better for more advanced users who don’t want to touch Arduino or use an installer.

[Mathieu] What have you learned in all your experiences?

[Paul] I’ve learned a lot about making technology easier for people, but quite frankly, much of what I’ve learned is that I still have a lot more to learn! I hope to do much more, and do it much better, in the coming months and years.

Switching to a 32 bit microcontroller, and especially writing a DMA-based USB stack and libraries that leverage the DMA controller, has also been quite a learning experience. Over the course of 22 years programming 8 bit MCUs with fairly simple peripherals, I’ve developed paradigms based on such limited hardware. Many of those techniques still apply, but this more powerful hardware, especially the DMA controller, really opens up a lot of possibilities I had never really considered before. In fact, that’s one of the Teensy 3.1 improvements I’m really excited about, going from only 4 to 16 DMA channels.
read the rest of article...