Arcade Briefcase (the Briefcade)

[Travis Reynolds] is part of an arcade club at work — the only problem? He’s the only one with an arcade machine, so they always end up at his place. So he decided to make his own portable, arcade briefcase to take to the office. It all started with a quick trip to Goodwill where he found a beautiful maroon briefcase from the 80′s, for only $5! He then took apart a spare LCD monitor he had sitting around, and it worked incredibly well in his favor.
Arcade Briefcase (the Briefcade)
He was able to reuse the LCD’s internal mounting brackets to secure it to the briefcase, and the video cables were just long enough to reach the Raspberry Pi. The next problem he faced was the joystick height. He picked a Sanwa style joystick which is fairly small, but even that was too tall for the briefcase. So unfortunately, he needs to remove the ball of the joystick before closing the case.

After testing out the proposed button layout, he cut a plywood mounting plate to hold everything in place. A bit of black spray paint later plus a power connector through the side of the case, and it’s complete! He’s running Shea Silverman’s PiMame, which has an easy to use menu, quick setup, and great support. It’s an awesome project, and very well documented in case you’re itching to do something similar — I know we are!Of course, if you have the space, a coffee table arcade machine is pretty sweet too…
[Thanks Brendan!]
read the rest of article...

Building a Raspberry PI Digital Photo Frame

Digital photo frames aren’t very interesting on their own these days, but building one with a Raspberry Pi and strapping it with a bunch of useful features just might motivate you to check out this tutorial on building a ‘living’ digital photo frame.
Building a Raspberry PI Digital Photo Frame

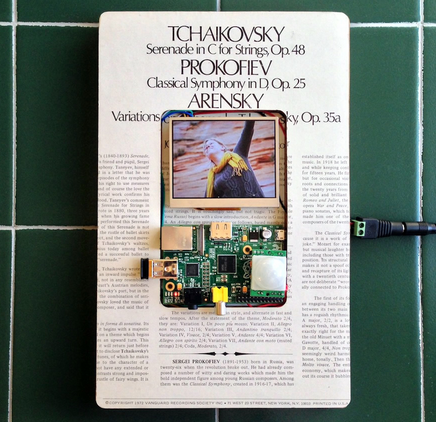
This is [Samuel’s] first project with the Raspberry Pi, so he decided to build a digital photo frame that has the ability to download random pictures from his Flicker account and display them in a slideshow format. With all that extra IO on the Raspi, it was easy to incorporate a status LED and PIR sensor. When motion is detected by the PIR sensor, the photo frame is enabled; after 60 seconds of no movement, the photo frame is disabled by turning off the monitor port.

We love finding detailed write-ups like this because there is so much useful information in here like using the Flicker API, GPIO control, image handling, how to configure scripts to run on boot-up, and even some great troubleshooting code.  If you’d rather ditch the Raspi altogether and take things down a few levels, check out this PIC based 100% DIY digital picture frame.
read the rest of article...

Recliner Sofa Given the Power of the Pi

If you go to buy a sofa these days you’ll not only be greeted with the option of one or more reclining positions, but a fully modern unit comes with motorized reclining. That simply wasn’t convenient enough for [Nicki] and [Kevin] who wanted to control the feature from a smartphone rather than a physical interface (buttons) on the side of the furniture. What resulted is the PiSofa, a Raspberry Pi connected to the furniture’s electronics with the help of a relay board.
Recliner Sofa Given the Power of the Pi
This is most certainly a hack, but no doubt one with a lot of finesse. Check out that white PCB. That’s right, it’s a factory spun board to keep things nice and neat. They went with one of our favorite tricks by housing everything inside of a food storage container. After some Ruby coding the Pi now has complete control of the sofa. We’re not overstating this. It literally is the only way to control it because the original buttons no longer work. But that’s okay, turns out not only does it work with their smartphones, but with a [Kevin's] Pebble watch as well. We can’t think of any past hacks that specifically targeted the couch. But here’s a hammock that you can drive down the street.
read the rest of article...

Raspberry Pi Car Deck

You can get all sorts of cheap car stereo decks from China, but where’s the fun in that? [Sentcool] is an IT specialist and electrician, and he decided he wanted something a bit more unique for his car — so he built this awesome Raspberry Pi car setup!
Raspberry Pi Car Deck
He’s using a Raspberry Pi Model B R2, a standard LCD car display (from China), a small 12V audio amplifier and an NF filter. The image above is from the first test of all the components together. He originally wanted to use a touch screen, but thought it might be too expensive for the project, so instead he’s carefully soldered switches onto some ribbon cable for the Pi’s GPIOs. Don’t you just love stripping ribbon cable?
From there it was just a matter of creating a nice wooden face plate and jamming everything into the center console of his car. It looks pretty good although the buttons could use some work — Don’t worry though, [Sentcool] is already thinking about upgrading it.

See more after the break!

read the rest of article...